Installation and configuration
- Download the latest build for your platform from the home page — Windows x64, Linux x64 (GUI or console) and macOS are available.
- Unzip the archive into a folder you can write to. Avoid
C:\Program Filesand other protected locations: Stealth keeps its profiles and logs next to the executable and needs write access there. - Run Stealth (
Stealth.exeon Windows).
You also need a set of Ultima Online data files on disk — map*.mul/*.uop, tiledata.mul, hues.mul, and so on. These usually come with the graphical client of the shard you play on. Stealth needs them even when running headless: character movement and pathfinding rely on the map and tile data to know which tiles are walkable or blocked, and many script functions query this data too. The files are also used to draw the World and Map tabs. You point the shard profile at this folder during configuration (see below).
The graphical client is patched only when the Atom assistant is enabled (the Use DLL option in Settings), and only to load Stealth’s DLL into the client — nothing else is changed. Because of this DLL injection some antivirus software may flag it; if the client refuses to start, add the Stealth folder to your antivirus exclusions or run without Atom.
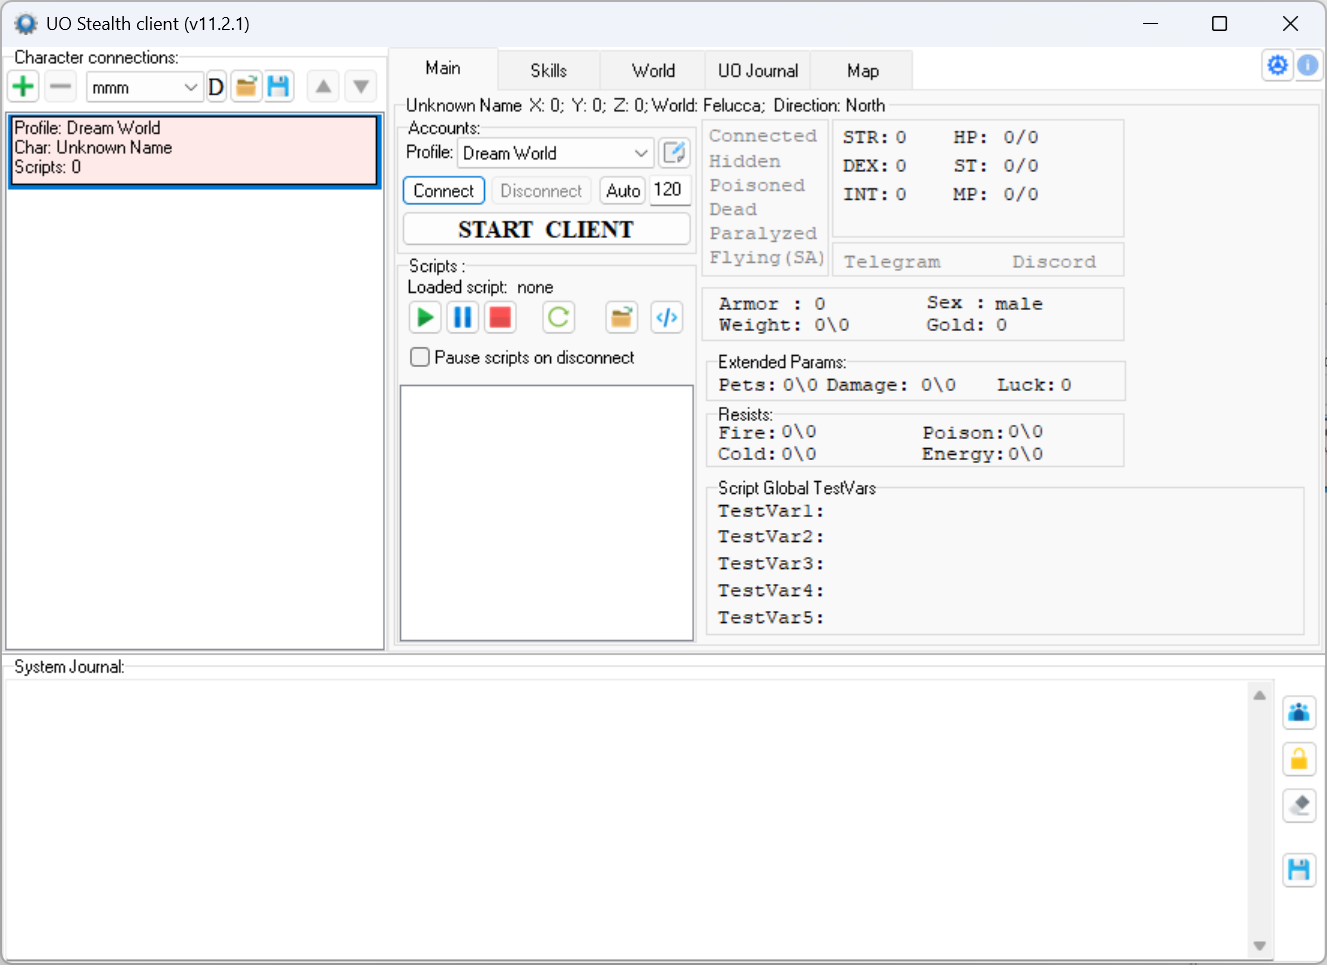
A quick tour of the controls you will use during setup:
- Character connections (left list) — each row is one character/bot connection. The toolbar above it: green + adds a connection, grey - removes the selected one, then the active-profile drop-down, the load/save-profiles buttons and ▲/▼ to reorder.
- Accounts → Profile drop-down and the pencil button next to it — choose the profile this connection uses; the pencil opens the Profiles setup editor (this is where configuration starts).
- Connect / Disconnect — log this connection into the shard headlessly (no graphics). Auto plus the number next to it enables auto-reconnect and sets its delay in seconds.
- START CLIENT — launch the graphical UO client (ClassicUO, Orion, classic 2D, …) attached to this connection.
- Scripts toolbar — run / pause / stop / reload a script, and open the script editor with the
</>button. - Top-right: the gear icon opens Settings, the i opens About.
To log in you create three small, linked profiles:
| Profile | What it holds |
|---|---|
| Client | a graphical UO client executable and how Stealth launches and patches it |
| Shard | a game server: address, port, client version, the UO data-files folder, and which client to start |
| Character | your account login/password, the shard to play on, and auto-login choices |
A character points at a shard, and a shard points at a client. You don’t need to open them separately — every parent editor has a pencil button that opens the child editor, so the chain is Profiles → Shards → Clients. The steps below follow that drill-down order; fill the deepest values (client, shard) before saving the character that references them.
In the main window, click the pencil button next to the Profile drop-down (the Accounts group). The Profiles setup window opens.
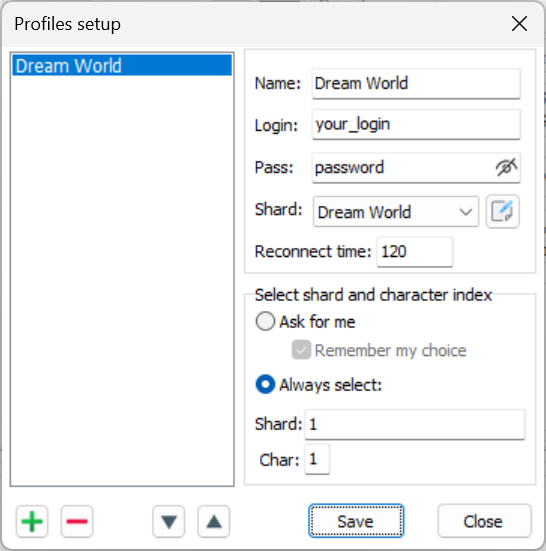
- Name — the name of this profile as it appears inside Stealth.
- Login — your game account login.
- Pass — your game account password. The eye icon toggles visibility.
- Shard — the shard this character plays on. Use the pencil next to the list to open Shards setup and add or edit shards (Step 3).
- Reconnect time — how long, in seconds, to wait before automatically reconnecting after a disconnect.
Select shard and character index — what Stealth should do at the server- and character-selection screens:
- Ask for me — Stealth asks you each time. With Remember my choice ticked, it stores your selection and reuses it on the next login.
- Always select — log in automatically using the two numbers below.
- Shard — the server’s position in the server list, where the first server is
1. - Char — the character slot, where the first character is
1.
Use the green + to add a profile and the red - to delete one (lower-left corner); ▲/▼ reorder the list. Click Save to keep your changes, Close to exit.
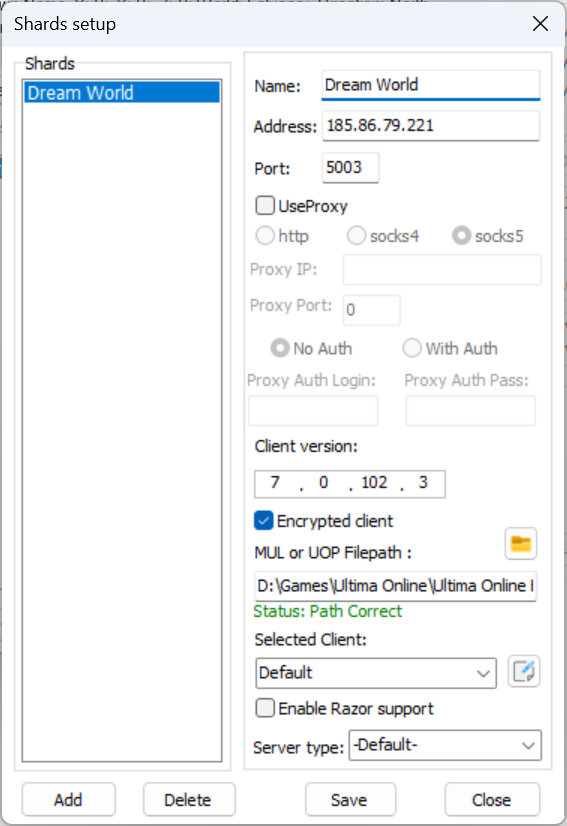
- Name — the name of the shard as it appears inside Stealth.
- Address — the server host name or IP.
- Port — the server port.
- UseProxy — route the connection through a proxy. Enables the proxy type (http / socks4 / socks5), Proxy IP, Proxy Port, the No Auth / With Auth switch, and Proxy Auth Login / Pass when the proxy requires authentication.
- Client version — the protocol version Stealth reports to the server, entered as four numbers. For example, client
7.0.102.3is entered as7 . 0 . 102 . 3. Set it to the version the shard expects. - Encrypted client — enable only for shards that use login/game encryption. Most free shards are unencrypted; leave it off if you are unsure.
- MUL or UOP Filepath — the folder with the UO data files (
map0.mul/.uop,tiledata.mul,hues.mul, …). Use the folder button to browse. The status line below shows:- Status: Path Correct (green) — the folder is valid;
- Status: Path Incorrect — wrong or incomplete folder.
- Selected Client — which client profile START CLIENT launches for this shard. Use the pencil to open Clients setup (Step 4).
- Enable Razor support — emulate an attached Razor assistant, for shards that only accept clients with Razor.
- Server type — leave -Default- for normal shards; choose a specific entry only for shards that require special handling.
Add creates a shard, Delete removes the selected one, Save stores your changes, Close exits.
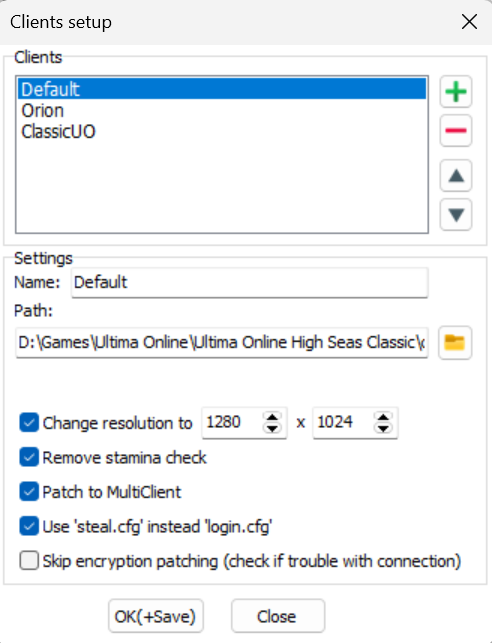
Open this dialog from the pencil button next to Selected Client in Shards setup.
The patches in this dialog apply only to the classic 2D client. Modern clients such as ClassicUO and Orion ignore them — for those you only need Name and Path.
- Clients (list) — all configured clients. The toolbar adds (+), removes (-) and reorders (▲/▼) them.
- Name — the name of the client as it appears inside Stealth.
- Path — the full path to the client executable. The folder button browses for an
.exe. - Change resolution to — force the game window size. Width
320–1600, height240–1024. - Remove stamina check — lets the character walk through other players and NPCs (movement patch).
- Patch to MultiClient — allow several copies of the client to run at the same time.
- Use ‘steal.cfg’ instead ’login.cfg’ — write Stealth’s local server address to
steal.cfginstead oflogin.cfg. - Skip encryption patching — disable Stealth’s client-encryption patch. Tick this only if you have trouble connecting.
OK(+Save) stores the client and closes; Close exits without saving.
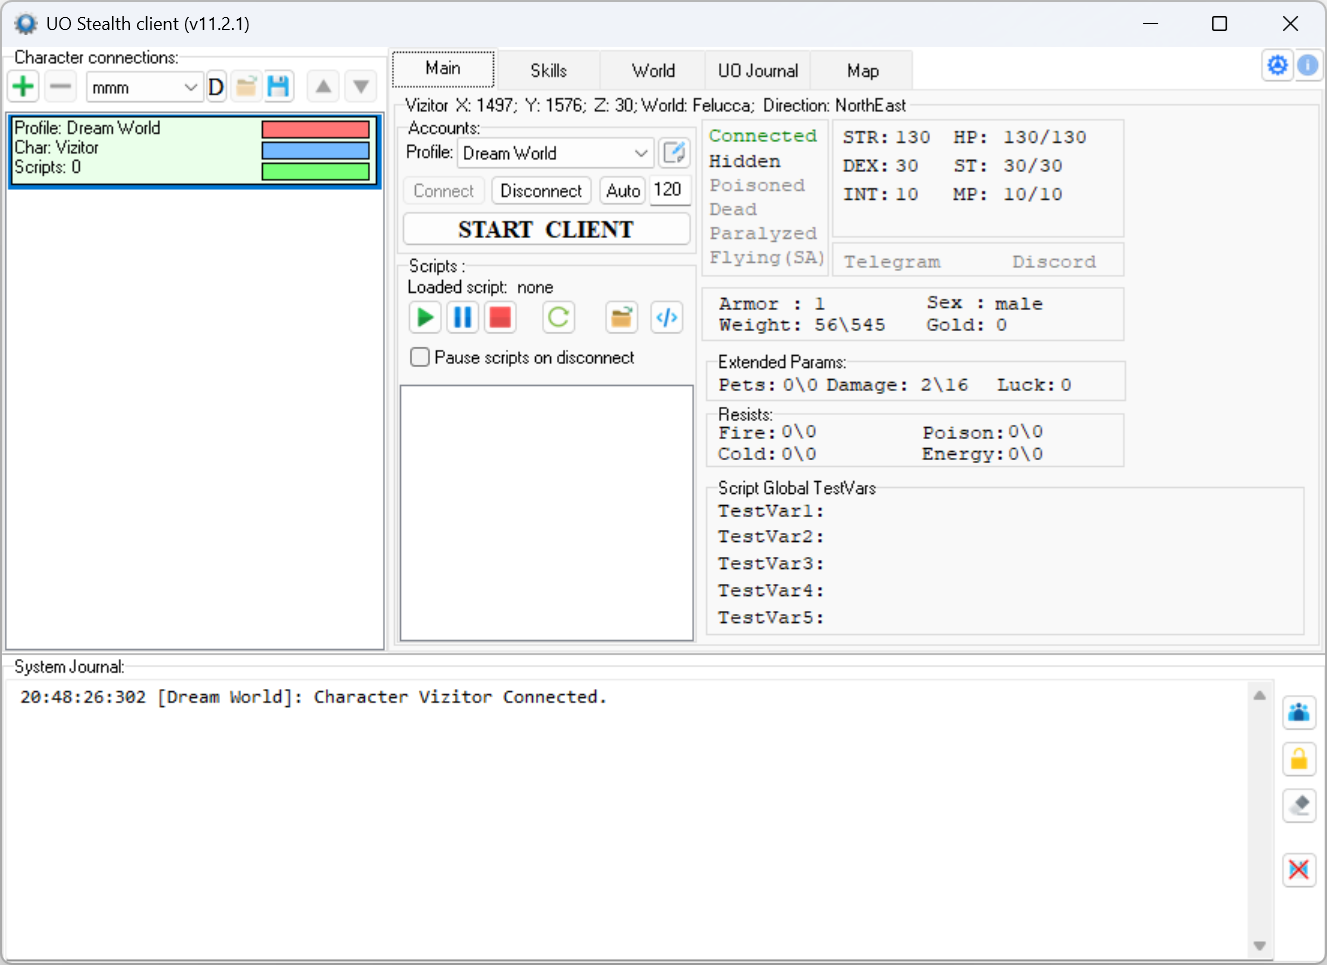
- Select the connection in the left list and choose your Profile.
- Click Connect. Stealth logs the character into the shard headlessly. On success the row turns green, the System Journal logs
Character <Name> Connected., and the live stats (STR/DEX/INT, HP, weight, resists, …) start updating. - Optionally click START CLIENT to open the graphical client and watch or control the same character. You can also stay fully headless and never start a client.
- Disconnect ends the session. With Auto enabled, Stealth reconnects on its own after the configured delay.
You are ready to script. Open the editor with the </> button in the Scripts toolbar.
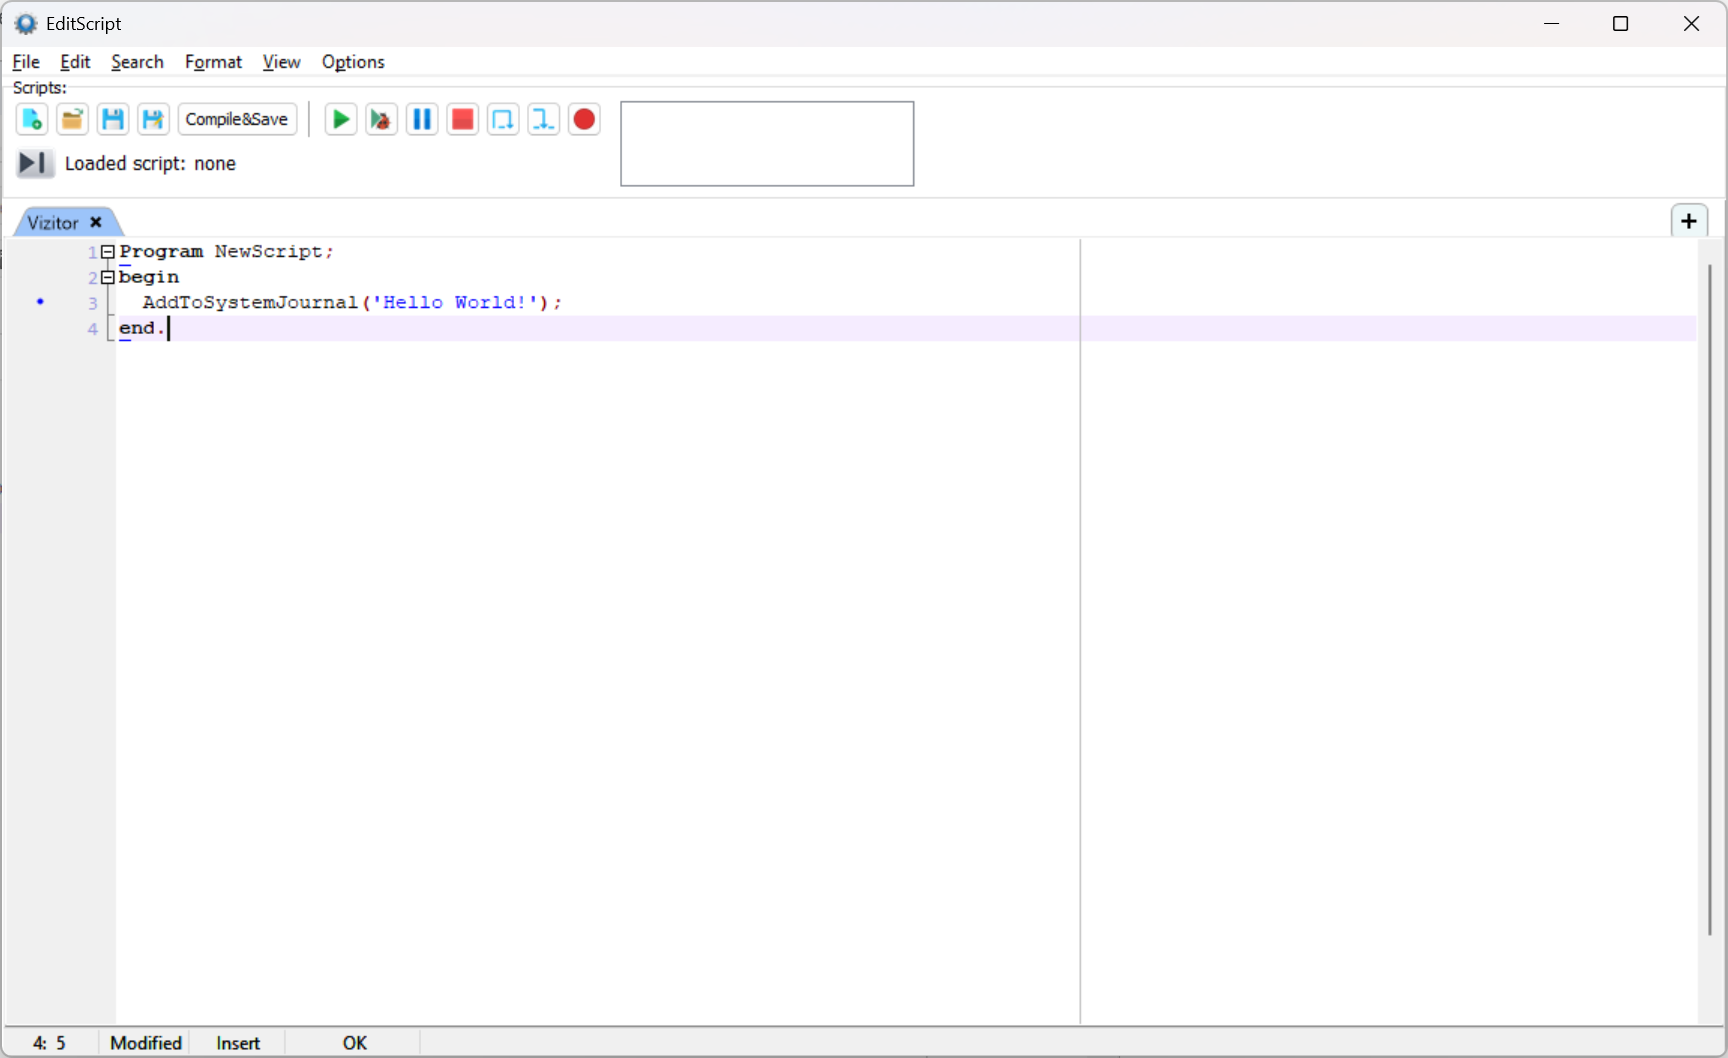
Type or load a script (the example above is DWScript Pascal), then press Start to run it. The output of the example — Hello World! — appears in the System Journal of the main window.
For the full list of functions, see the API reference; the other entries in this Manuals section cover settings, launch arguments, messengers and more.